Remember these roses? It turns out that if you want to make a panel full of them it takes about a million of these pretties. Soooooo I made them larger. Here's how to make them grow, and then how to create a hanging with them.
Start with a base flower. If you don't remember how to begin, check out the post,
Practical Tips For Making Large Paper Roses With Tutorial, Part 1.
1. For the base flowers, the curls were optional, but if used, they faced towards the center of the flower. To make the roses grow, the curls are no longer optional--I used a glue stick to curl mine--and they will face toward the outside of the flower.
2. Curl four petals, and attach them using hot glue to the base of the flower. Before attaching the petals, try to judge how far out on the base to glue them. If you end up gluing them too closely to the center, just rip them off and adjust as necessary.
3. Grip the petal with your index finger in the center, thumb and middle finger on the outside, so you can gently bend them toward the flower.
4. See where the petal will touch the flower? That's where to apply the hot glue. Umm, be careful not to burn yourself . . . have that cup of ice water handy!
These roses got so big, I ended up using full pages for the petals.
Attaching the petals looser and looser, making the flower more open and larger.
There are many ways to display the roses. I used the panel method, which proved fairly easy to construct, display, and hang.
I used a piece of this scrap foam insulation panel, which was a bonus, as it was a pretty big piece, and it was for the reduced price of free. Originally, I thought I'd make one huge panel, but, ahem, it didn't fit in the back of my car . . . sooooooo it was cut into two panels, each about 26 by 60 inches. This type of foam is found at home improvement stores in 4 by 8 foot pieces, in various thicknesses--mine was an inch thick. It's super easy to cut with a razor blade, and as the edges will be covered by the flowers extending around it, there's no need to worry about exactly straight edges.
One side of the panel is all pink, so you may be happy with that--I wanted any panel showing through to be be white, so I used an old sheet and hot glue to wrap the panel.
These panels were destined to be hung in the corners of a room with a drop ceiling, so I used hot glue to attach large paperclips in various places at the top of the panel, just to make sure there would be at least a couple of them that would work for suspending the panel.
Arrange the flowers on the panel before hot gluing them in place.
 |
| That piece of paper you see by the clip is cut into a heart--I added it so you couldn't see the clip. |
Here you can see I used binding clips to clip onto the drop ceiling, with a simple paper clip chain that hooked to the panel. Sounds goofy, but it worked great. The clips make for no damage to the ceiling or walls, and the panel is so lightweight, it was no problem keeping it suspended.
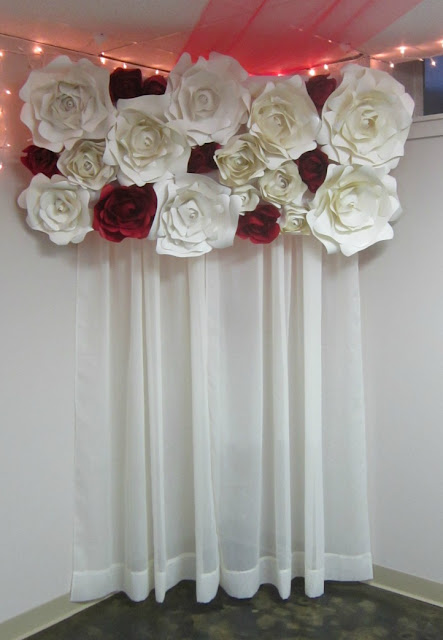 |
| I used a tension rod and curtains, also hung with clips, behind each panel. |
Here is one of the panels in action--there was another in the adjacent corner of the room. These were also surprisingly easy to transport, as they stacked easily. Using a nice weight of cardstock made the flowers super sturdy, so no worries about smashing.
Not a great picture, but it gives you an idea of how big some of these roses grew. These panel gardens were well received at the Valentine dinner, and their presence has already been requested at a bridal shower. I love it when my projects get used more than once!
:)trisha


No comments
Thank you for visiting the CutCardStock blog! We appreciate your comments.